Showing posts with label Burlap. Show all posts

Wednesday, July 30, 2014

DIY: Burlap-Covered Corkboard


For awhile, I've loved the look of the nailhead-trimmed, burlap covered corkboard offered by Ballard. I have several Ballard things and love them all, so by no means am I hating on them! The burlap corkboard was just more than I wanted to pay, especially not having a specific place in mind for where I wanted to hang it.  After seeing a few Pinterest DIYs, I figured I could do this myself!

I had a plain corkboard in an upstairs closet that I wasn't using and a lot of burlap fabric just waiting for some project! This meant I needed a staple gun and some upholstery tacks. I also needed some additional cork for the board.

I did a poor job of taking photos as I went along (especially in the beginning), but I'll try to explain my process!

Let me first say, I know this is not an awesome "DIY" post by any means! It's more "read the instructions" than "follow along with pics" which, as we all know, are far more helpful. I'm sharing, though, because I didn't really follow any DIYs to the letter...

I knew covering just the board (as-is) with burlap or the cork would cause the middle to sag (because of the wood frame). So, I found something build up the center making it flush with the wood frame. Using something I already had...I used a flattened Priority Mail box that I trimmed a bit. Whoop, free!

Once I had everything flush, I used a roll of cork to make a new cork surface.
http://amzn.com/B003H93FFS
This is from Amazon, but I got mine at Lowe's. Basically the same and the price was similar, if not a bit cheaper. Once I had the new cork applied and trimmed to size, it was time to bring out the burlap.

I laid out the burlap on the floor and laid the corkboard facedown to figure out the appropriate size. After I trimmed the piece I was going to use, I ironed the daylights out of it! Because burlap is so thick, I used the hottest setting on the iron, spraying the wrinkles with water before ironing.

Once I was satisfied, I again laid out the burlap on the floor, put the corkboard facedown, and pulled the edges back. I borrowed an electric staple gun from my coworker and enlisted TJ's help in pulling the burlap tight enough to the back of the board. I used a lot of staples...
Clearly I need to trim the burlap and apply the "no-fray" stuff I have...

Moving on now that the board is covered! Ta-da! (And now I put it away for a few days. I needed a break as this was not going as fast as I expected!)
Time to work on the trim!

I used these furniture nails from Lowes. They were 25 to a pack and only $1.30 each. You'll need more than one pack, but be careful when buying them to ensure they match fairly well. There were two completely different colors at Lowes that both said "brass."
 I thought this part would be easy. Wrong!

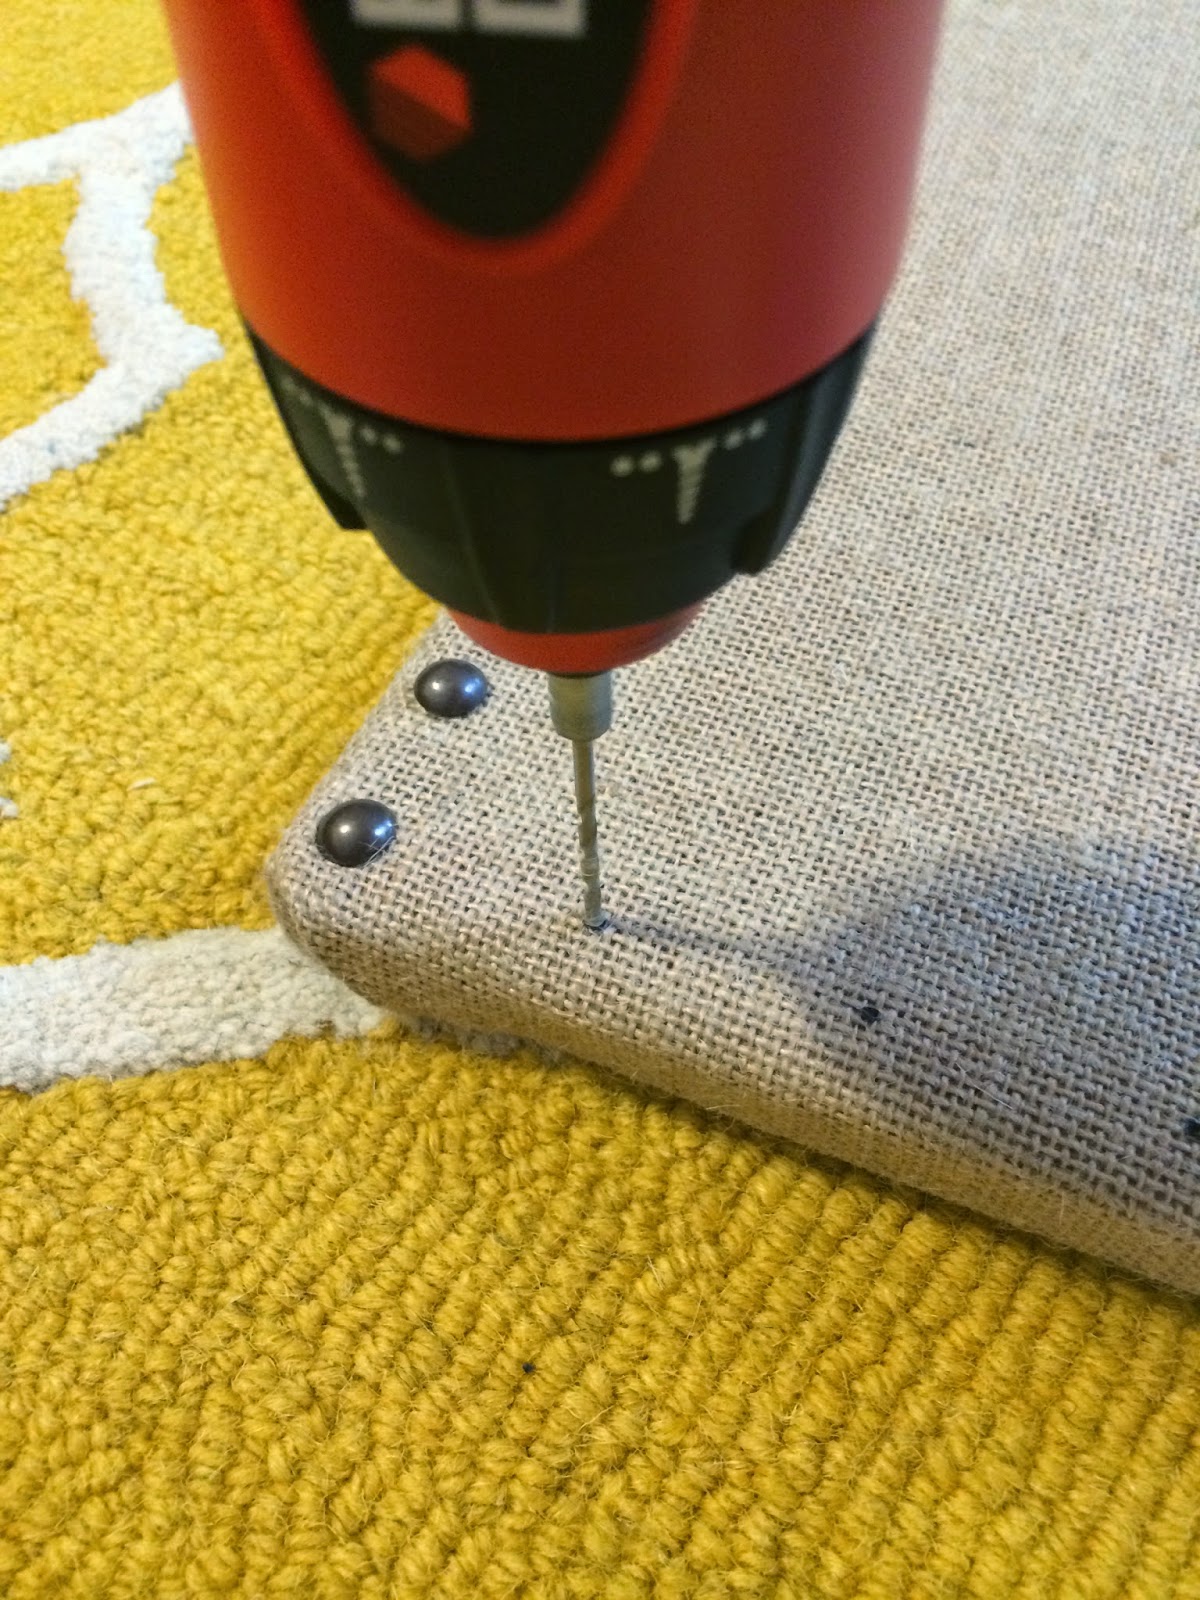
The wood frame beneath all the cork and burlap proved to be problematic when trying to add the trim. The upholstery tacks/furniture nails were very soft and kept bending when I tried to hammer them into the wood. So, I got a rubber mallet and used pliers to hold them in place, but the problems continued. I tried drilling tiny holes to get me started. People, I BROKE A DRILLBIT and it barely even worked! TJ suggested a slightly larger drillbit, and drilling a slightly smaller hole. This proved much more successful...

Before I started drilling all the holes I measured the distance and spacing of where I wanted the tacks and placed small sharpie marks, which you can see above. I used the drill holes to get me started, then used the mallet to hammer the tacks flush with the board.

There were a couple times I drilled too deep and the tack ended up just bouncing out of the hole. That's where I recruited a little helper I like to call KRAGLE. That's a Lego movie reference for you...it was Krazy Glue :) It worked wonderfully!

End result...
ta-da!

Let me know if you try it out! Now I just have to decide where to put it :)

Thursday, February 21, 2013

DIY: Burlap and Burns -- Saw It. Pinned It. Did It.

Well here it is, 10:17 p.m. on Wednesday night, and I'm writing this post. Nothing like a little last minute posty for you girls, right?! Right!

First things first -- can I just tell you how giddy this made me?
I know, I know...it isn't anything huge, I'm not a 3000 follower blog,
but hey...considering my posting schedule isn't FAB...it made me smile! :)

Now, back to how it's pretty late the night before the SPD Linkup....oh yeah,
I definitely have burns from the hot glue gun all over my fingers. Owie!

You will need:
-Styrofoam wreath form
-1 roll of burlap (depending on how full you want your wreath)
-Scissors
-Hot glue gun
-Wooden letter
-Acrylic paint
 (this may have been a pic I texted my mom...ha)

I got my original idea from none other than Miss Katie herself:

Sadly, I started this wreath almost 3 weeks ago. Following directions from Katie, I cut many, many pieces of burlap appx. 8 inches long. I started pulling an end string from the middle of the strip, creating "gathers" in the burlap. It required pulling several of the strings to get the burlap strips scrunched up quite how I liked them.
Now, unfortunately, I failed to read Katie's directions thoroughly on the next step, when I started gluing on my bunches of burlap. She glued on two rings, one somewhat closer to the center and layering another around it. I overlooked that step (oops) and started off just gluing my bunches to the face of the wreath.
(Evidently I am tired. I just typed "glying" for gluing, and "reach" for wreath)

Even with just one ring of burlap, it still looked pretty decent. 
 And it was at this point that I cleaned off my table and walked away from the wreath for nearly three weeks. Oopsie.
Tonight I came back to it, so I'd have something to post tomorrow.  Yeah I said it.
I cut some more burlap strips, created the bunches, and started gluing them closer to the outer edge. I had to put them close to the existing burlap because, as I said, I failed to read instructions and do it right the first time.
 You'll notice I cut many of the loose strings from the burlap, though I think Katie left some of hers. I chose not to do this, because my wreath will be outside (we don't have a glass storm door), and there's a bird that likes to build a nest on my porch. I figured a bunch of loose burlap strings would encourage her to pull them loose for her nest!

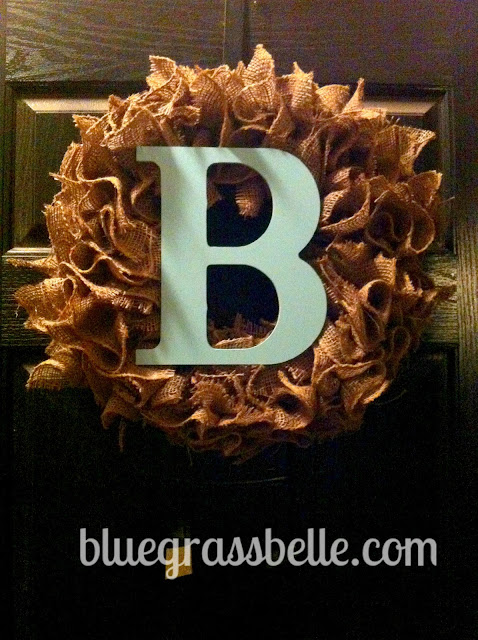
After this, I glued on my painted letter. It's a light turquoise/aqua blue color, nice for spring?
There weren't a ton of font choices, so I decided to go with this...
(In looking at these pictures, I can't decide if my wreath is fuller on the right side, or if
my letter is just a bit catty-wompus...)
This wreath is super easy and fast. Fast, assuming you don't leave it half-finished for 3 weeks ;)

Go forth my crafty bloggies! Make something fun,
and don't forget to link up with Stephanie and Katie!

Thursday, January 10, 2013

DIY: Printing on Burlap -- Saw it, Pinned it, Did it. Success!

This week, I'm back for my second installment of Saw it. Pinned It. Did It.
And this time, ladies, I have a success story! Whoop Whoop!
 
My original inspiration came from this pin:
http://media-cache-ec3.pinimg.com/736x/65/f1/c6/65f1c6dfe1f623822e588d8170ac7c6d.jpg

However, my first attempt was a total flop, which you can read about here: Saw it, Pinned it, Did it. Almost. Following that "success," I decided to try the printing on burlap tutorial found here:
http://media-cache-ec4.pinimg.com/736x/0d/ce/68/0dce6864be1dbaed5dd2238aa28a919f.jpg
via
 
First things first....you'll need:
-Burlap (8.5x11 for this project)
-Scissors
-Iron
-Computer & ink-jet printer
-Freezer paper
 
This is the freezer paper I used, which I purchased via Amazon:

Let's get started then, shall we? Set up your iPad tutorial and ironing board and get to work!

There are two "sides" to freezer paper. One side is a bit more dull dull and the other side is more slick/shiny. Place the shiny side "down," touching the burlap (or the fabric you want the paper to adhere to). Once the paper is in place, run a medium-hot iron over the paper a few times, concentrating on the corners to ensure they are adequately adhered.

After you've ironed the freezer paper to the burlap, cut the excess from the edges, following the shape of the freezer paper. Remember, it has to be pretty close because it needs to fit into your printer. You don't want any loose edges to 'catch' on anything!
Once your burlap paper is ready, hey, now we're cookin' with peanut oil, Jack!
(Two points for those of you who got the reference to the best show on TV!)

In my original burlap monogram post, I told you to flip your letter. Forget everything we talked about last week, because this method is a lot easier! With this technique you don't need a mirror image--what you see on screen is exactly what prints out!

(Also, not shown below, but I put the burlap "face down" in my printer. The feed tray on your printer should help you determine the optimal way to load the burlap paper.)
Once you're ready, hit print, cross your fingers, say a prayer, and hope for the best!
Ta-da!
The black is not as dark or as saturated as I might have IDEALLY liked....but I can live with it!

I've yet to decide where this will ultimately "live," but for the time being, I placed it on this trunk with my little birdie. It's easily visible upon walking in the front door of my house.
Notice the difference in the photos above? iPhone vs. Canon digital SLR. I've been trying to use my Canon a little more lately. Even if it is just for blogging! :)

I hope this "tutorial" of sorts helps you out if you decide to try printing on burlap. If you have any questions, feel free to leave them in the comments and I'll do my best to answer!
Don't forget to link up with Stephanie and Katie for Saw it Pinned it Did It!